Welcome! If you are reading this, then you’ve come to the right place. In this article, I’ll share the most efficient method for obtaining and installing Windows 10/11 directly from Microsoft and show you how to activate it for free. Additionally, I’ll provide invaluable tips on how to elevate your performance experience by utilizing free and open-source tweaking tools for Windows. So sit back, relax, and let’s dive into the world of Windows optimization!
First step: Obtaining and Activating Windows 10/11 for free
- Don’t worry about downloading and activation, I’ll guide you through the process of downloading the official Windows ISO file directly from Microsoft’s website, and then demonstrate how to use a free, open-source tool to activate it without any hassle.
Step 1: Go to Microsoft’s official website and determine which version of Windows you need, and download the Windows ISO file for the version you want to install.
— For Windows 10, click this link, download installation media, open and select Disk Image ISO to download)
— For Windows 11 - click this link, hover down, Download Windows 11 Disk Image (ISO).
Step 2: Once the ISO file is downloaded, create a bootable USB drive using software like Rufus or Microsoft’s Media Creation Tool.
Step 3: After creating the bootable USB drive, insert it into your computer and restart your system.
Step 4: While your computer is booting up, press the key that takes you to the boot menu and select the USB drive as the boot device.
Step 5: To avoid unnecessary pop-ups, switch off your internet connection.
Step 6: Follow the on-screen instructions to install Windows on your computer.
Important things:
-
When the Activate Windows pop-up shows, click on the I don’t have a product key.
-
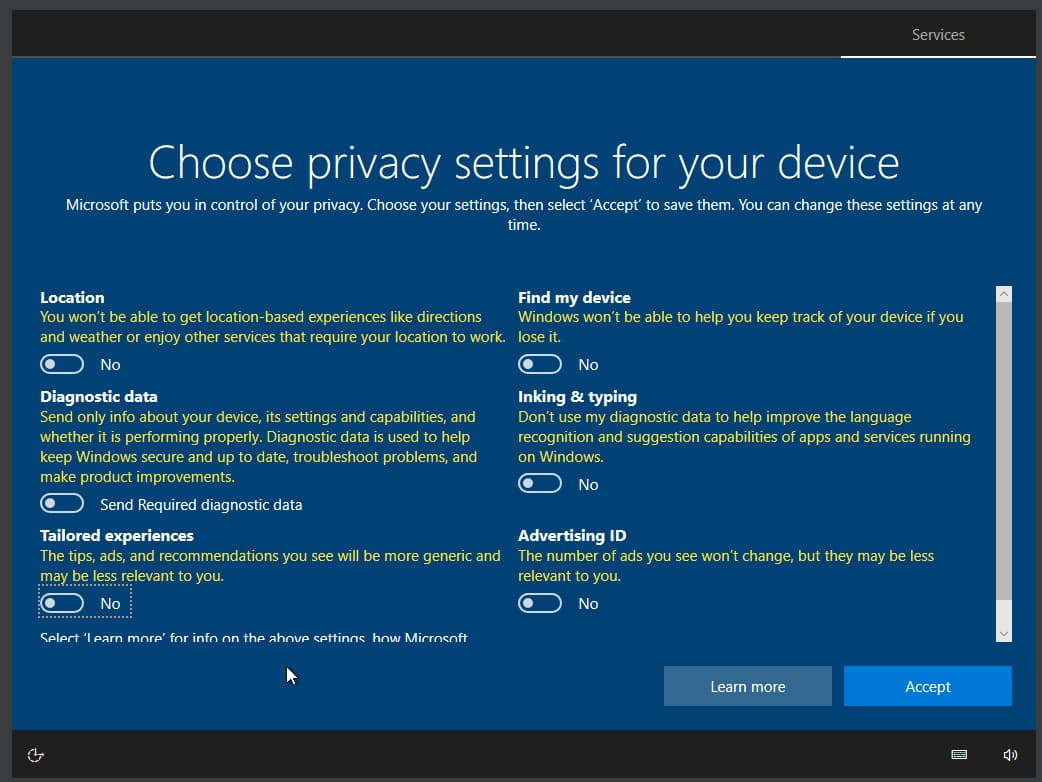
Uncheck all these to minimize Microsoft’s data collection.
Step 7: Once Windows is installed, it’s important to check for updates to ensure that your system is up to date. At this stage, your Windows has not been activated, but don’t worry! We can use an open-source tool called Microsoft Activation Scripts (MAS) to activate your Windows for free and without any hassle.
You wanna know the tricks to activate it without spending a 💎?
- Open PowerShell in administrator mode, Copy-paste the below code and press enter
irm https://massgrave.dev/get | iex- You will see the activation options, and choose either option 2 or 3.
- That’s all.
Second step: Take your Windows experience to the next level by optimizing its performance and privacy. You can achieve this by applying some simple tweaks.
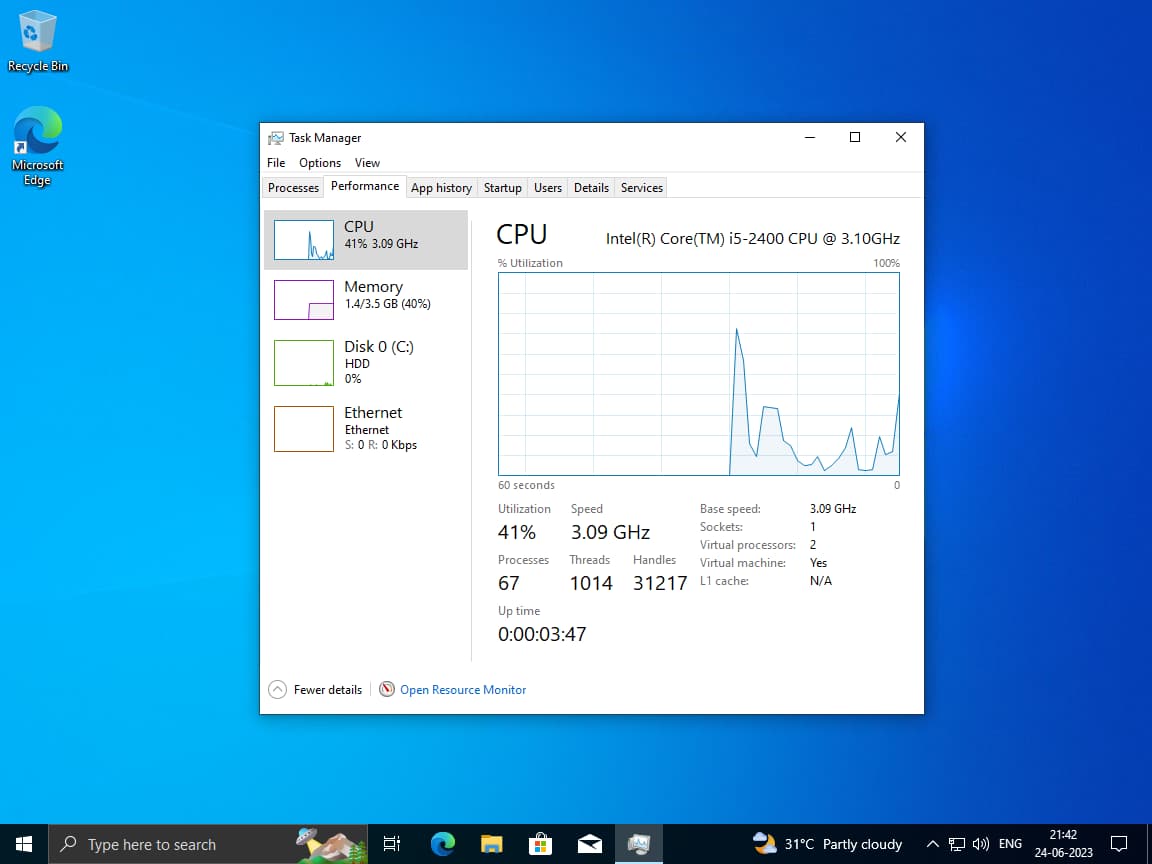
- Since this is a fresh installation on a virtual machine, the number of background processes currently running is around 70, but for you it could be 150-200. After optimization and tuning the number of processes will be around the half of your current process.
Disable unnecessary startup programs:
Step 1: Press Ctrl + Shift + Esc to open the Task Manager.
Step 2: Click on the “Startup” tab.
Step 3: Here you will see a list of programs that start with Windows. Right-click on the programs that you don’t want to start with Windows and select “Disable”.
Step 4: Repeat this process for all the programs that you want to disable.
Adjust power settings:
Step 1: Click on the Windows Start menu and type “Power Options”.
Step 2: Click on “Power Options” to open the Power Options menu.
Step 3: You can also click on “Change plan settings” to customize the power plan further.
Step 4: To maximize your computer’s performance, select the “High performance” power plan. However, keep in mind that this plan may consume more power and reduce battery life if you’re using a laptop.
Tweak the Windows for Snappiness!
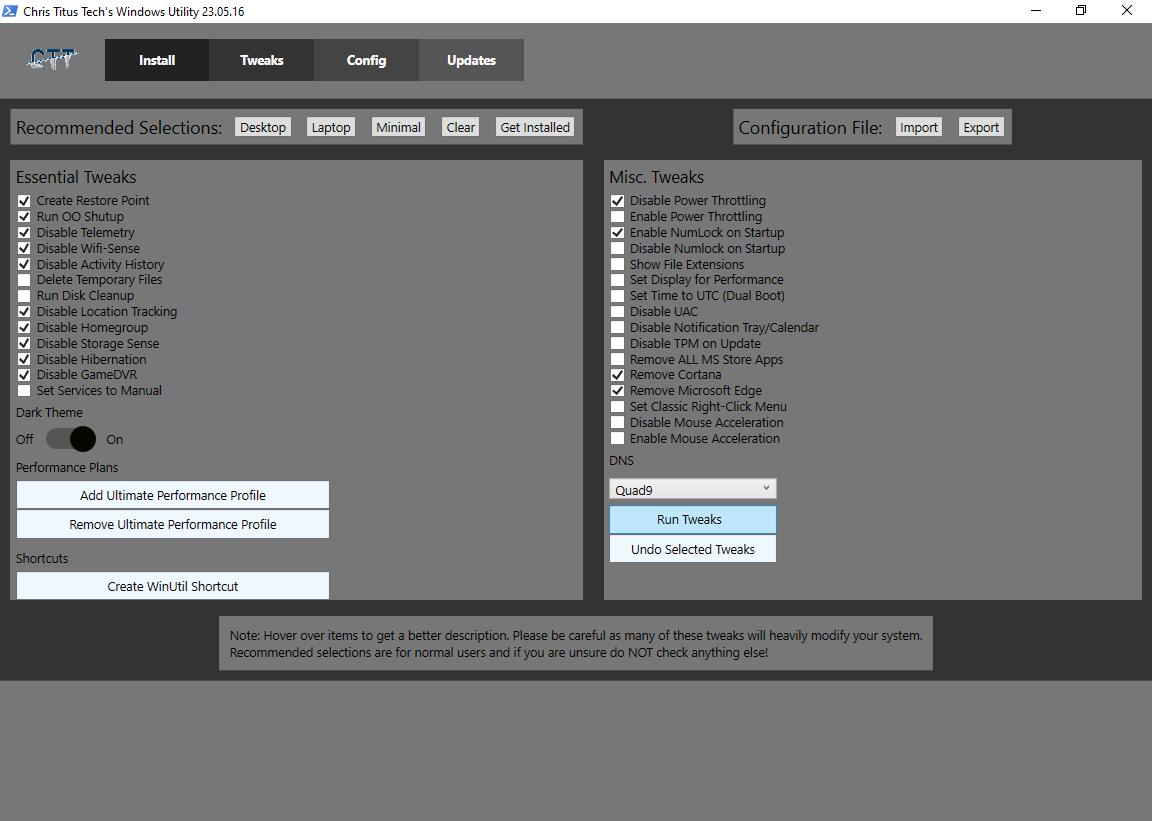
- Check out ChrisTitusTech’s WinUtil on GitHub for an all-in-one Windows optimization tool.
-
Open PowerShell in administrator mode, Copy-paste the below code and press enter
-
irm christitus.com/win | iex -
Go to the Tweak section and select the recommended selection also refer the image below, and change DNS to quad-9 and click on Run Tweaks.
-
After tweaking done, restart your PC.
We’ve made some progress in optimizing your privacy and reducing background processes. Let’s take it a step further with two more tools.
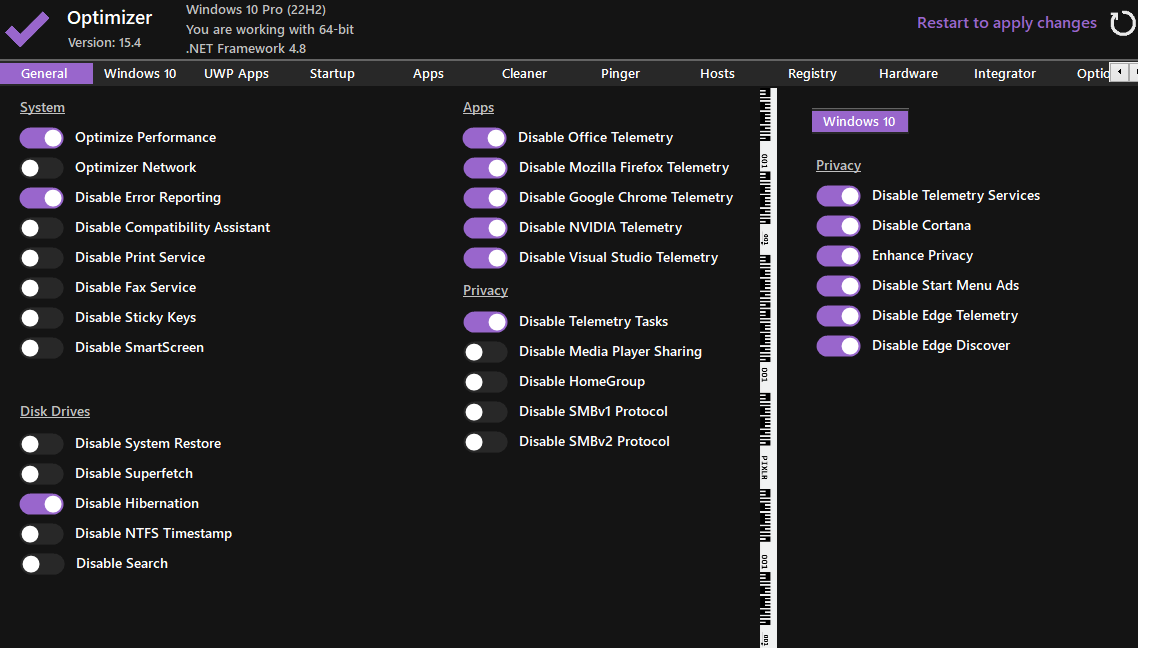
- Optimizer - The finest Windows Optimizer
-
Download the “Optimizer” tool from the GitHub repository.
-
Click on the Optimizer.exe file and check the options as per the below image.
-
Once the optimization process is complete, restart your computer to apply the changes.
- QuickBoost - Automated Windows 10 / 11 Tweaking Utility
See the instructions and tweak your system.
🅞🅟🅣🅘🅜🅘🅩🅔🅓
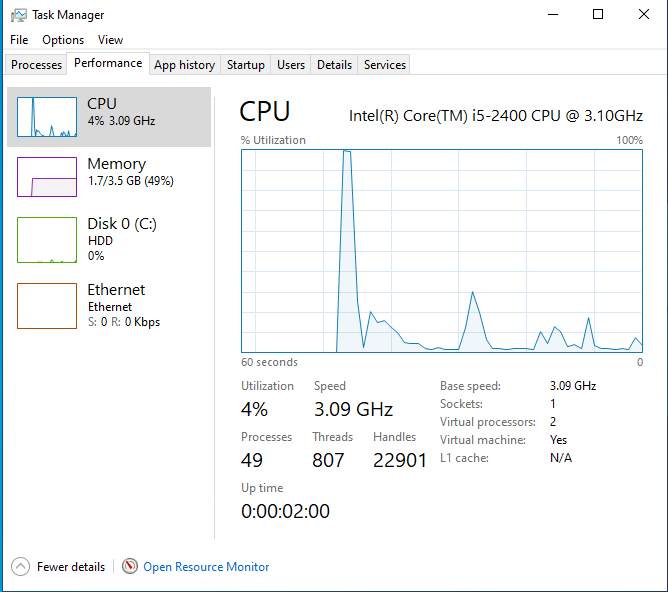
After careful optimization and fine-tuning, the CPU processes have been successfully reduced to an impressive 50, delivering faster and more efficient.
You can find further tweaks and enhancements in this GitHub repo.